
Running Toilet – How to Fix ShutOff Valve, Fill Valve, Flapper
 Here’s how to fix a running toilet – pretty much rebuilt it – including the shutoff valve, fill valve and flapper to stop a running, hissing, filling toilet…
Possible Issues – Here’s a few things that might be happening that this post can help you fix…
Constantly running toilet – A running toilet is probably caused from your flapper being old or build up of some type around it preventing a good seal. This allows water to leak into the bowl, reducing the water in the tank and the fill valve keeps filling it up. How to test: drop food coloring (3-5 drops) in the toilet tank and watch in the bowl to see if a small, colored stream trickles in.
Hissing toilet – Similar to the above, the fill valve keeps running. If you know it’s not the flapper, your fill valve is probably bad.
Can’t Turn off Water – Your shut off valve (at the wall) is probably bad.
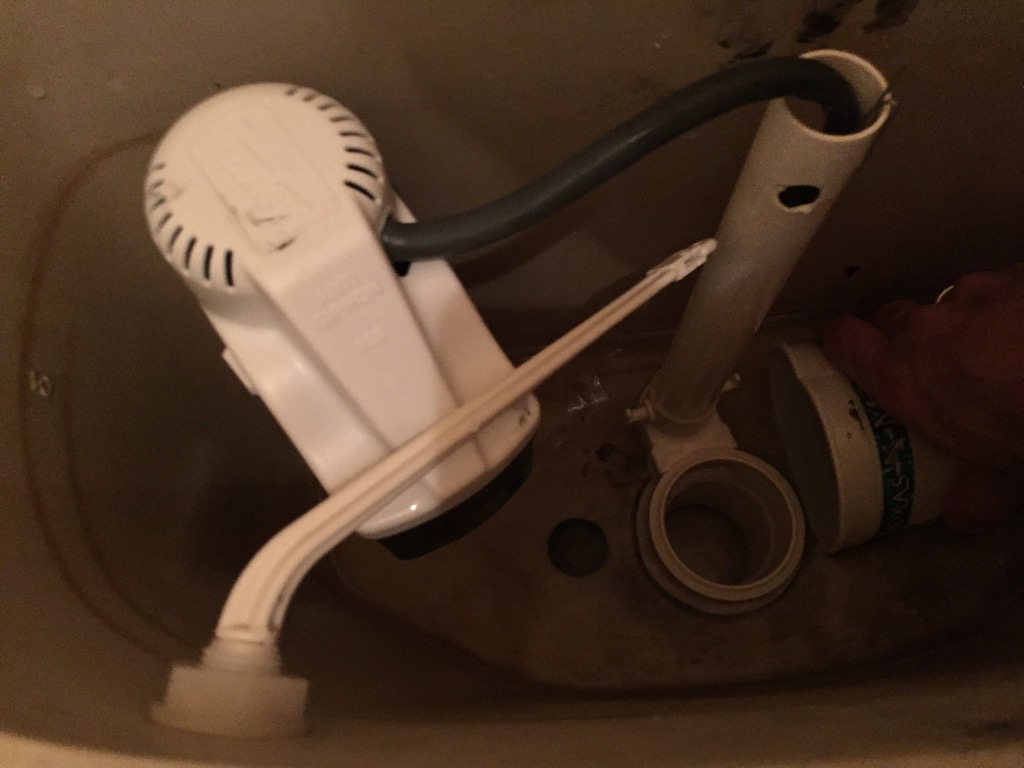
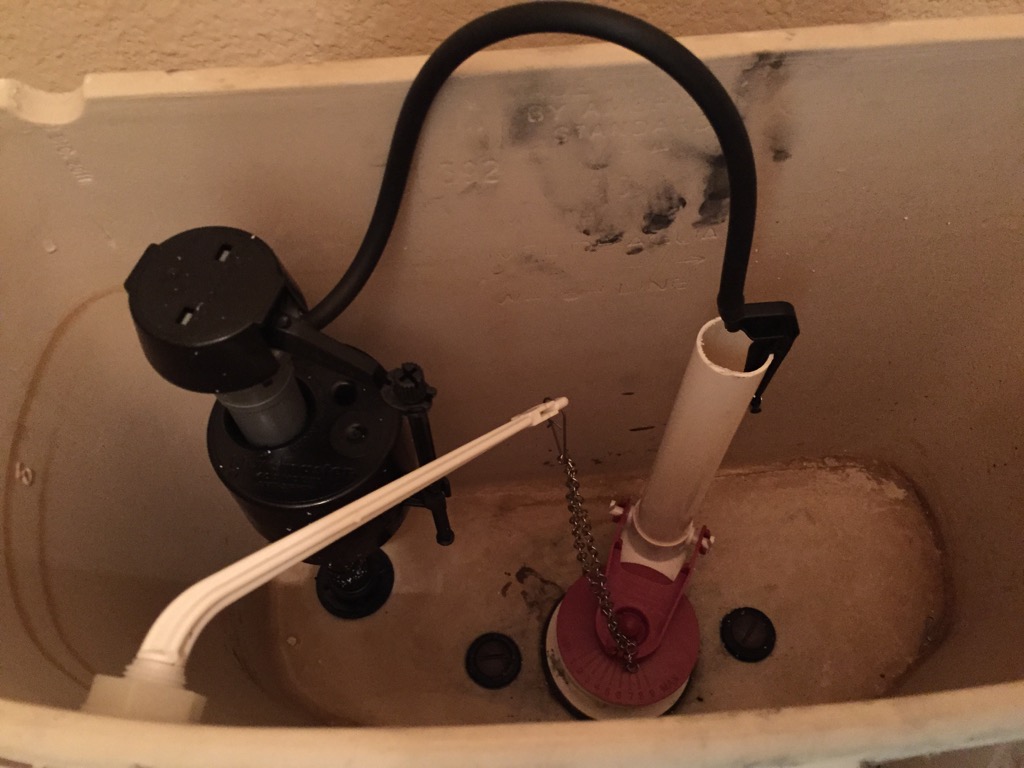
So last week we were on vacation and came home to water on the floor by our running toilet. The fill-valve had gone bad and was slowly letting water in. My overflow tube was too high so the water got to the handle hole and slowly leaked out.
I knew I needed to stop the running toilet, but my shutoff valve wasn’t shutting off the water so I needed to replace that too. To keep it from leaking anymore, I drilled a hole in the overflow tube where it should have been cut off.
I did research and found the parts I needed. I’d done this before (except fo
r the shutoff valve) so I knew what I needed. And just a few tools.
Running Toilet Repair Outline
- Prep – parts, tools, shut off water, remove old parts
- Replace ShutOff Valve
- Replace Fill Valve
- Replace Overflow Tube/Flapper
- Wrap Up
Running Toilet Repair Prep – parts, tools, shut off water, remove old parts

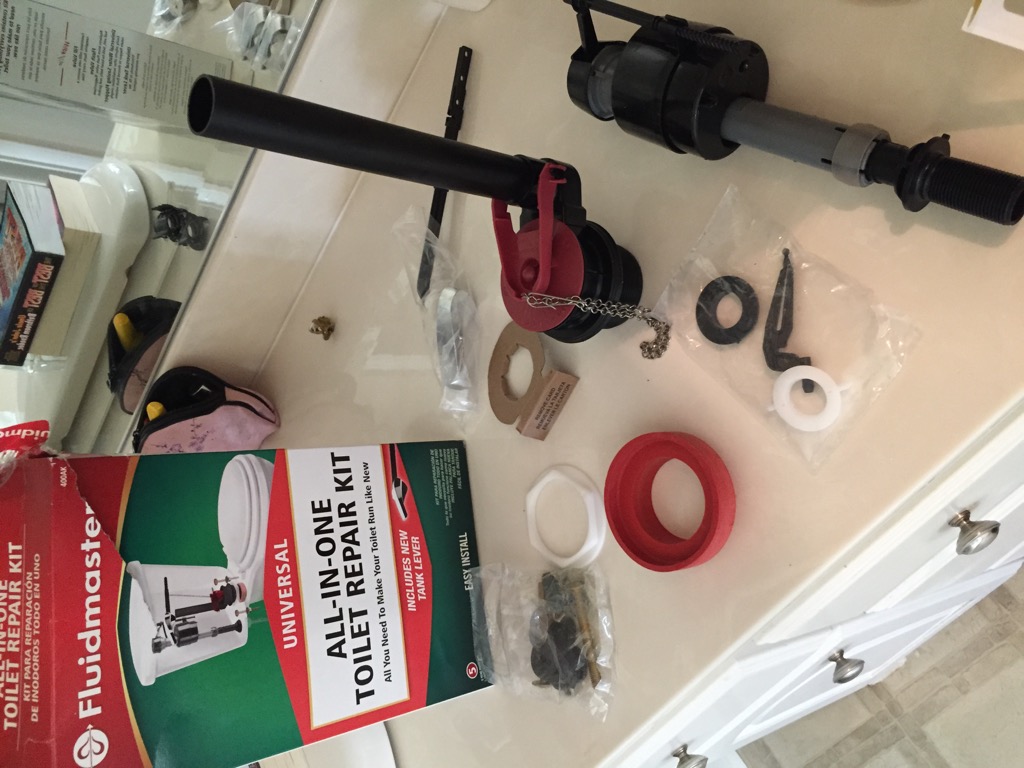
I like Fluidmaster parts so I got the Fluidmaster Complete Toilet Repair Kit. It comes with everything (more than I) need. Like with all exciting projects, I need to show the unboxing. When the package came, the whole house was excited… yay, no more air-raid siren when we flush!
I also got the BrassCraft G2CR19X 1/4 turn compression shutoff valve. Now, I know there’s been a lot of press lately about the G2CR19X being a bit of a diva, but I don’t buy it. I never felt good turning my old valve over and over and trying to get it super tight. I always felt like I was going to snap it off and get a “water effect” behind my toilet.
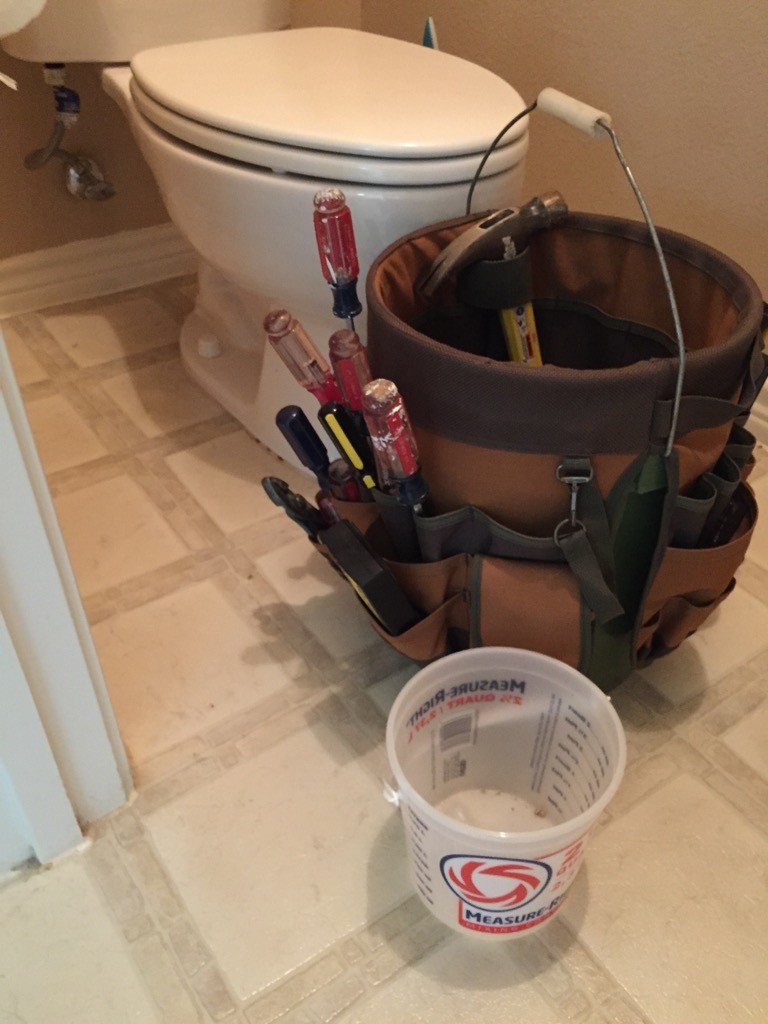
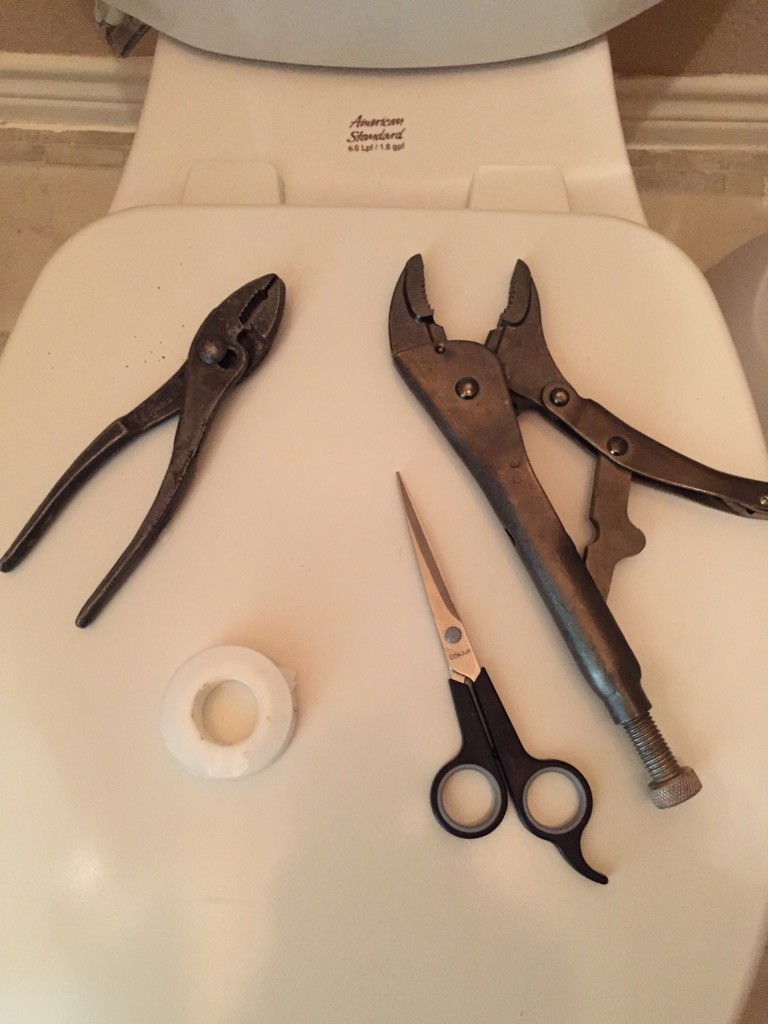
I grabbed my Bucket Boss tool bucket… although, I’ll say I only really needed about 4 things: vise grip, pliers, teflon tape and scissors.
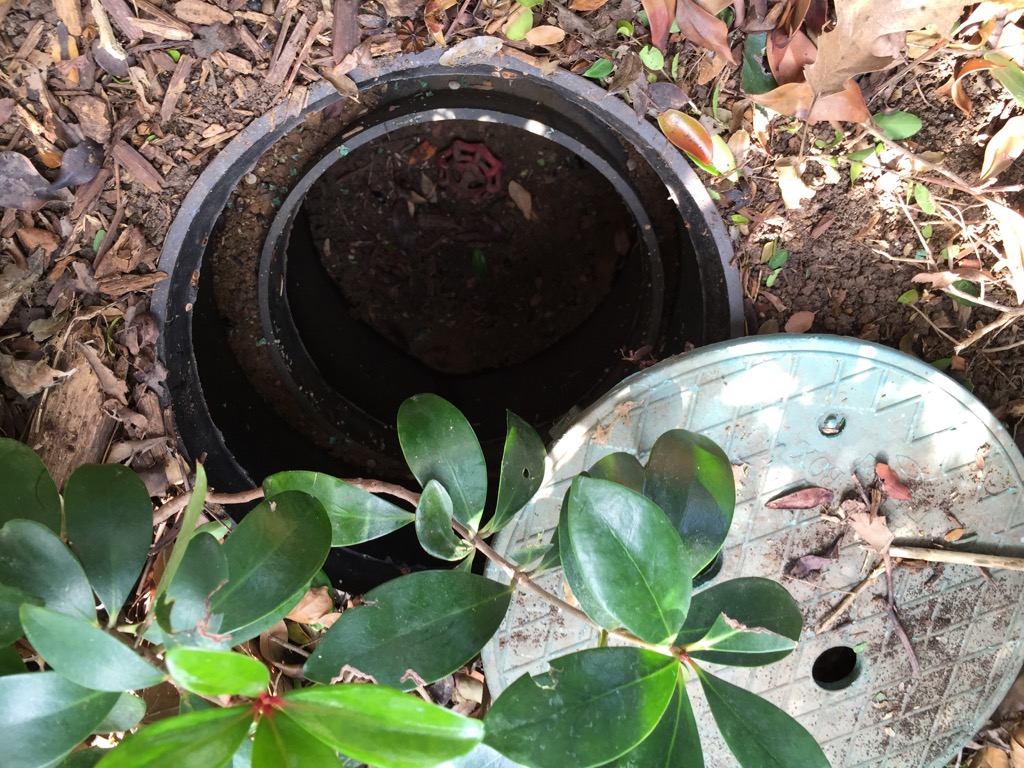
Step 1 – Water Main: The next question was where is the main water valve for my house? I searched around in the shrubs and found the elusive green plastic cover. Nailed it! I turned it clockwise 9 “half turns” – I counted because I knew it was going to freak out when I went to turn it back on and wasn’t sure how far to go. 9 half-turns was the number.
I turned on the water at a low point in the house – bathroom tub. It drained in like 2-3 seconds! I thought there would be more. However, as you can see from the pic, I turned on the hot water – habit from bathing kids. It did not wind up being a problem, but you should do the 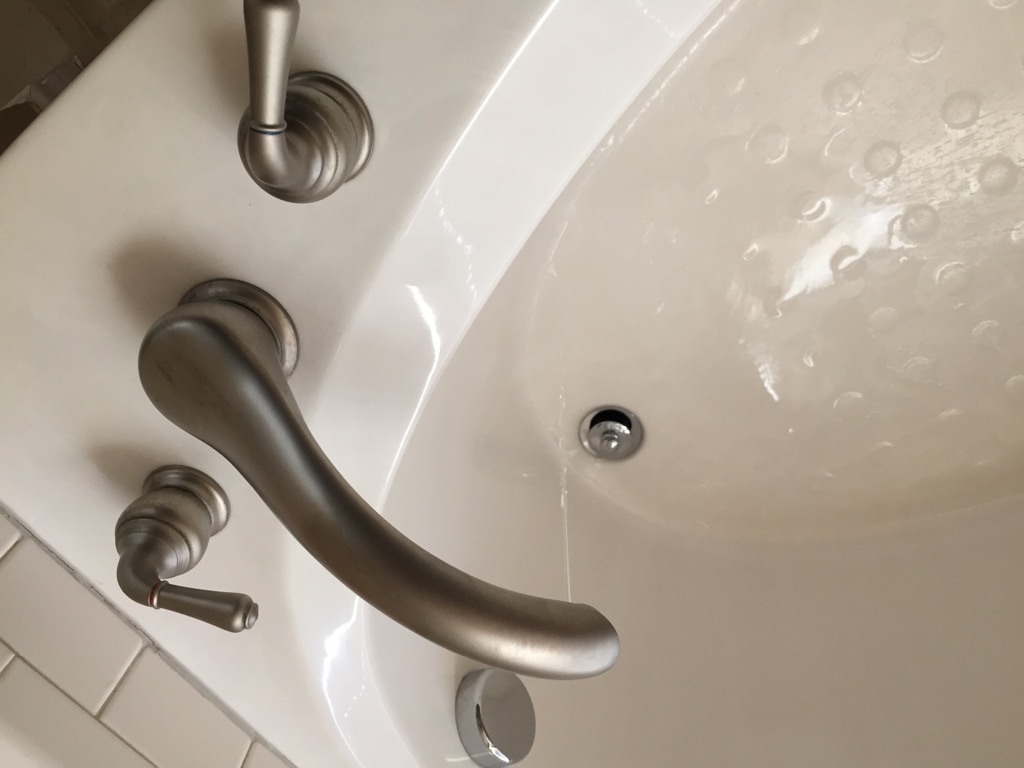 cold side.
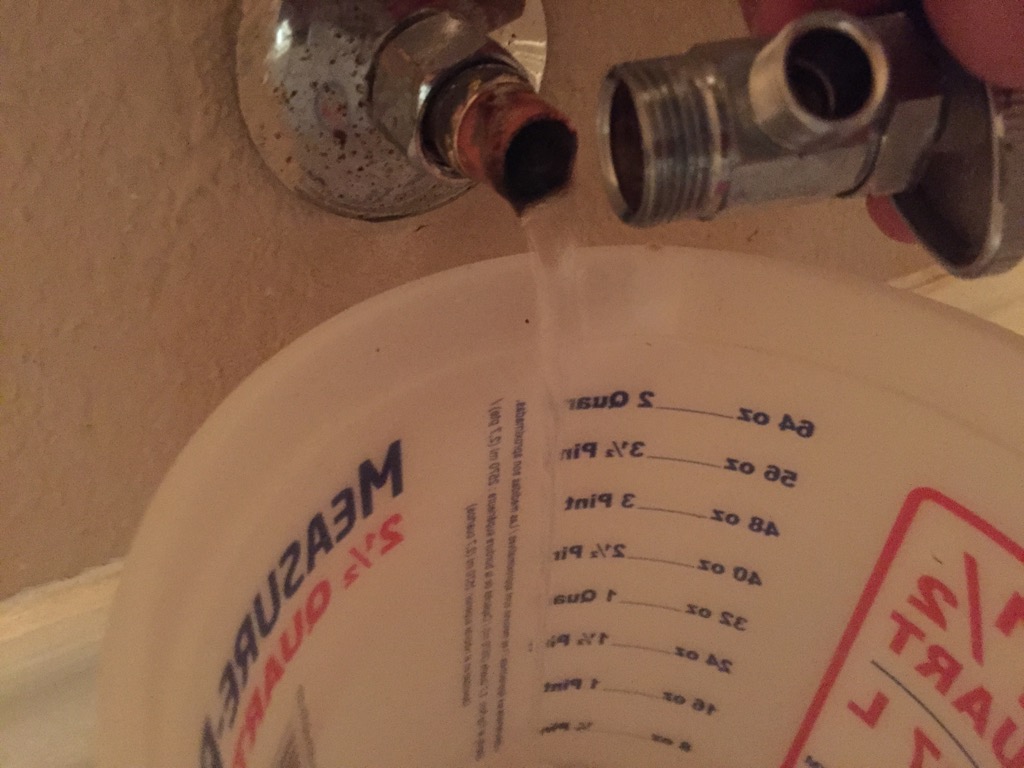
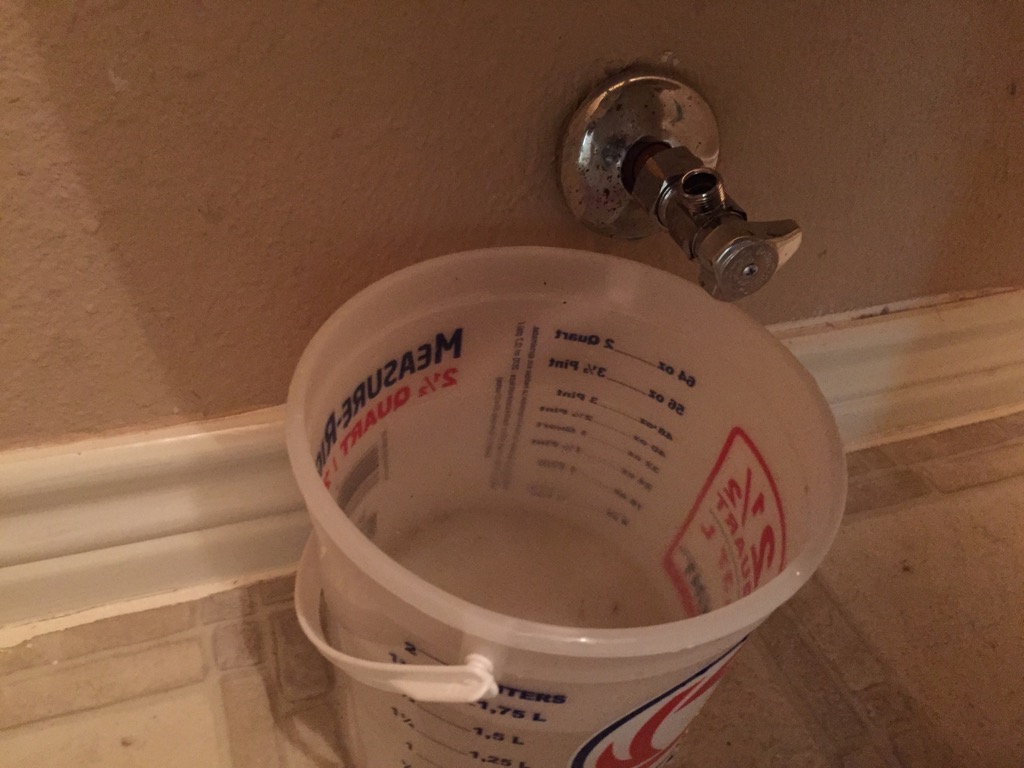
Note: your shutoff valve will be lower so there will be water that comes out. I got a total of 2 quarts in my little bucket so be prepared for some water.
Step 2 – Drain Tank: Then I held down my toilet flush handle to let all of the water out of the tank. There will be some water left so I used a cup (barely visible in the terribly dark image) to get as much out as I could (poured it down the flapper hole) and then sopped (like gravy with a biscuit) up the rest with an old towel. Yes, it needs to be an old one – new towels will refuse to go in a toilet tank. Fancy pants!
Running Toilet: Replace ShutOff Valve
If you’re not able to shut the toilet off from the wall, you need to replace your shutoff valve.

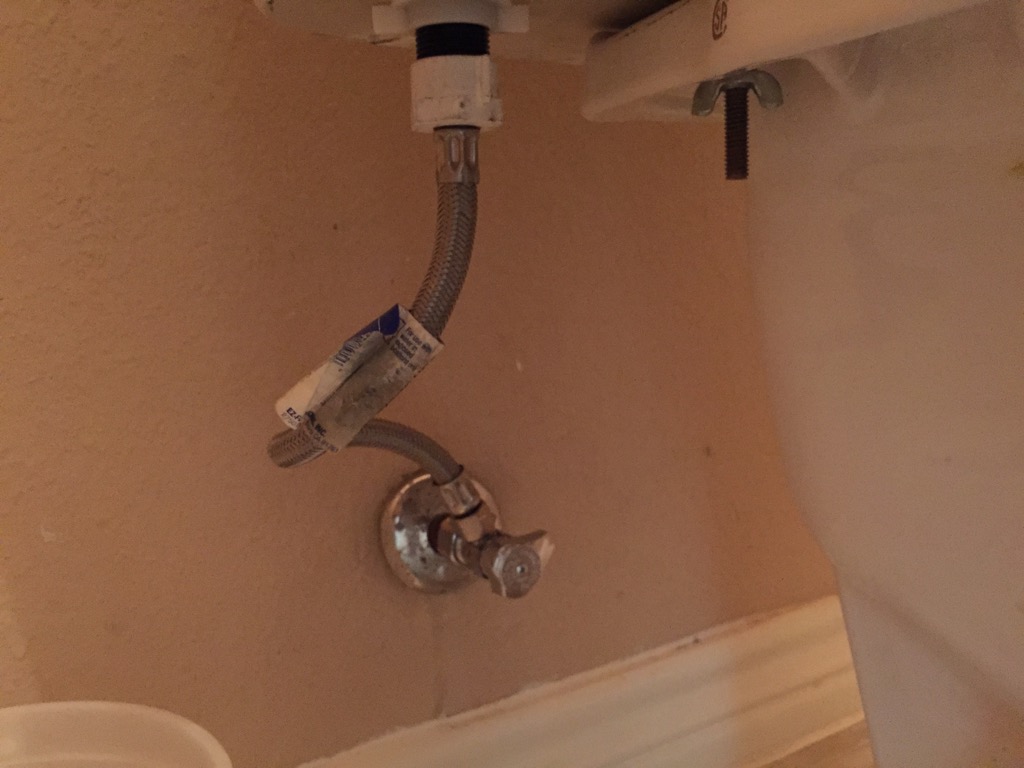
Step 3 – Remove Water Line: Remove the water line from the shutoff valve at the wall. Use a regular wrench or pliers or something. If you can’t do this w/o more details, you have no business doing this project. Lefty loosey.
Some water may drip out – have a little bucket (see pic) under it.
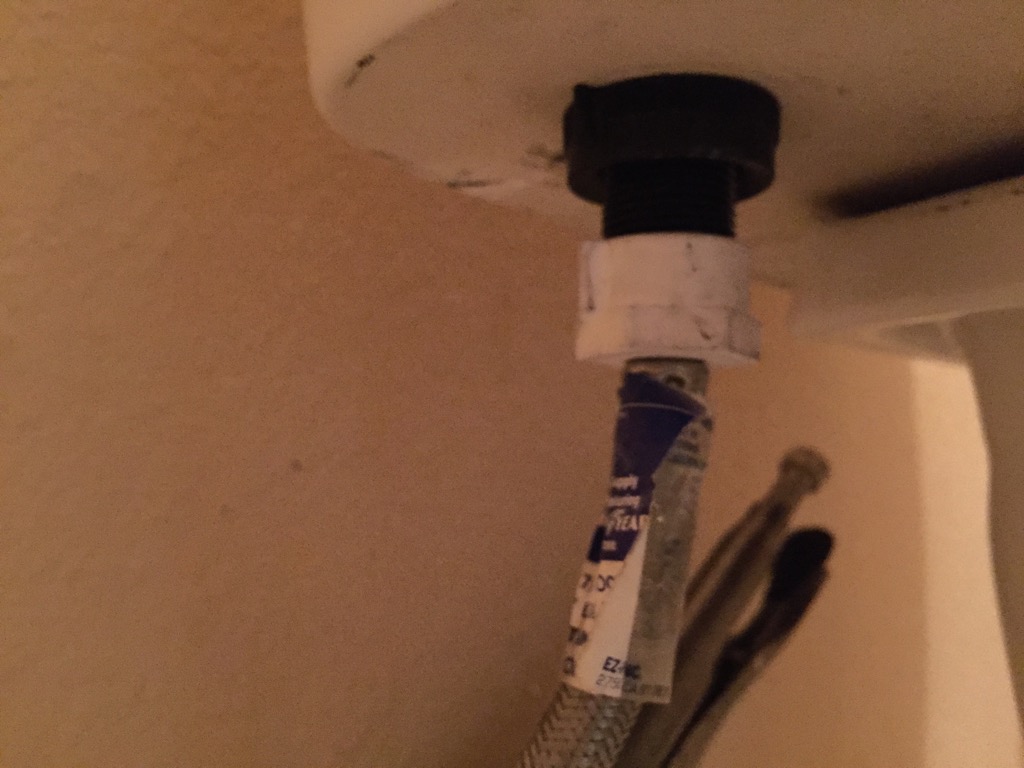
Then remove the other end of the water line from the bottom of the toilet tank – it’s connected to the fill valve… all coming together now, right? Getting a clear picture of the mechanics here?
Step 4 – Remove Shutoff Valve: Now this is probably the hardest part of the running toilet project and once it’s done you’ll realize it really wasn’t that hard. Although, it would be easier with the right size wrenches (or similar) instead of a vise gripe and pliers. I’d like to say I used these to show it can be done. I’ll go with that.
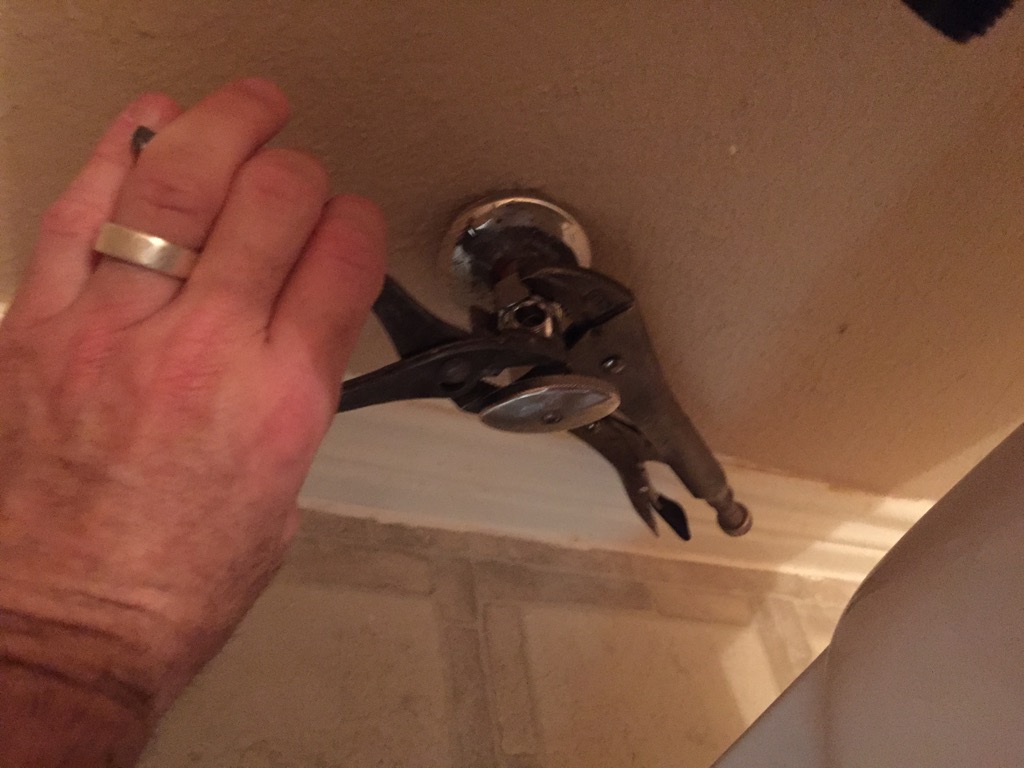
You’ll need to hold the shutoff valve still (see pliers on left in pic) and twist the compression nut clockwise. This nut is screwed onto the valve so you’re not unscrewing it from the wall side, but from the front side. So it’s backwards from what you might initially think. Imagine you’re holding a water bottle with the top facing away from you and you’re twisting off the top. It’s clockwise, right?
When you remove it, a good bit of water may pour out – again, have your bucket handy.
I’ll be honest here. My old brass compression ring and nut didn’t want to come off (and I didn’t want to be yanking on a copper pipe inside my wall. They looked fine and were the same size so I just used those.
Step 5 – Install New Shutoff Valve: Wrap some teflon tape on your sweet BrassCraft G2CR19X and slide it on the pipe. Screw the compression nut onto the shutoff valve. I had to rest my chest on the toilet lid and wrap my arms around the back to get the angle right. Again, this was a bit of a pain and the hardest part of the project.
If all you’re doing is replacing the shutoff valve, you can replace the water line (see Wrap Up below) and turn your house water back on. You got r done.
But if you’re like me… sorry. But if you are, you probably want to go ahead and ruin… replace everything while you’re at it. This project went well, but typically it’s best if there’s no one in the house while I do this. And by “do this” I mean prepare a bigger project for whatever professional we need to call when I’m done.
Moving on…
Running Toilet: Replace Fill Valve
If you have a running toilet (and it’s not the flapper), you probably have a bad fill valve. This was the problem that prompted me to do all this work.
Step 6 – Remove Fill Valve: Actually, the fill valve is pretty easy to replace. Once the water line is removed (above), unscrew
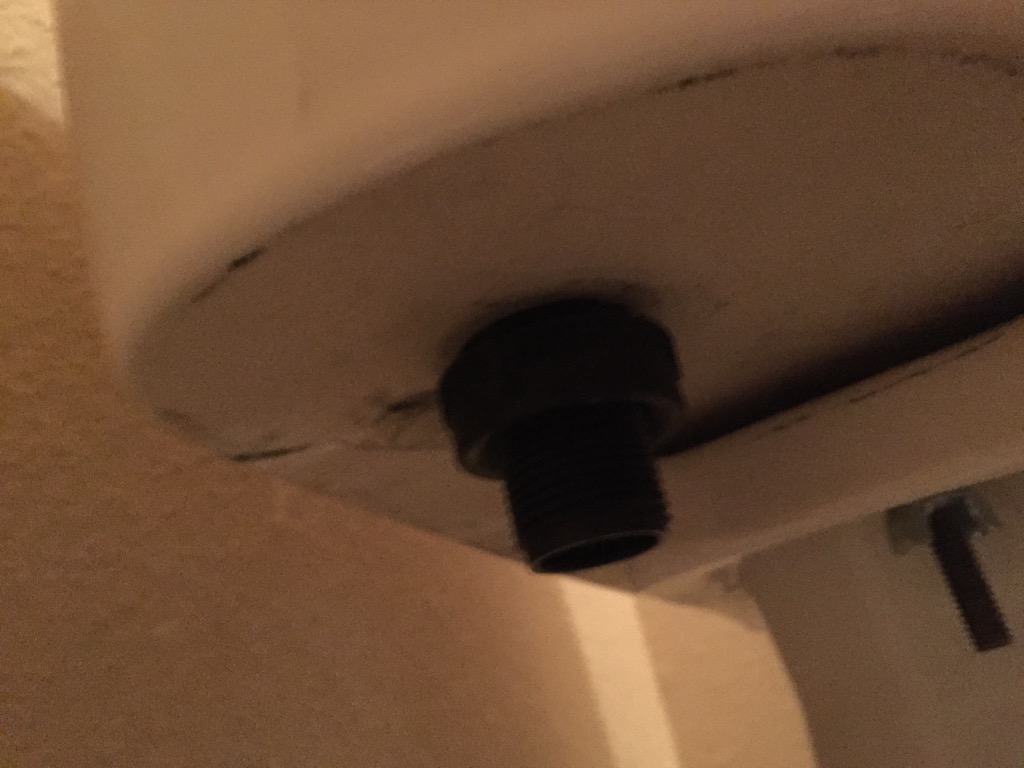
the nut holding it on (bottom of tank) and pull the fill valve out. Like a cartoon mechanic, just throw it away. It’s broke so it’s done. Don’t be tempted to keep it for spare parts or take it apart to see how it works. You’ve got better things to do.
Step 7 – Admire New Kit: Inspect the parts from your running toilet repair kit. If you’re really going to rebuild the whole thing, you’ll probably use all of this.
Step 8 – Install New Fill Valve: Read the directions on installing the fill valve. Basically you’re going to put on the rubber washer, put the fill valve back in the hole and screw on the nut from the bottom.
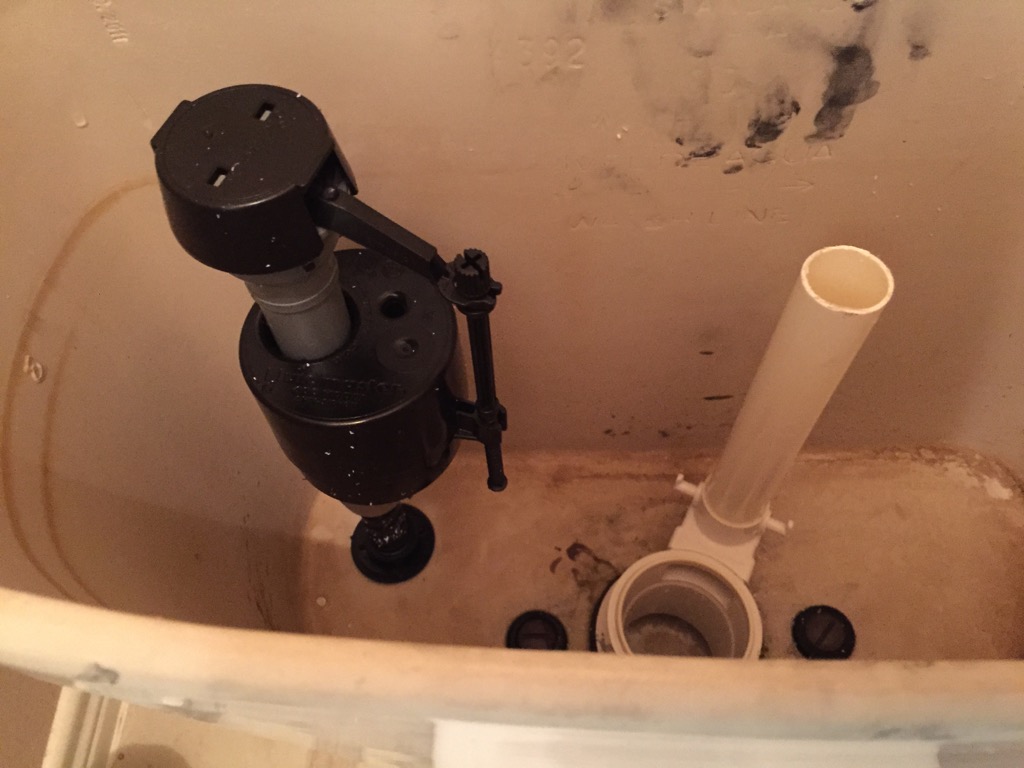
For the FluidMaster, you may need to turn the upper section (see instructions) to raise the top of the fill valve to be 3 inches above the overflow tube. Once my fill valve was in, I cut off my overflow tube where my drill hole was (I removed my flush handle to do this and used a mini hacksaw (not pictured) to cut the tube).
Then put the nipple clip (what?) in the overflow tube and connect the rubber tube to the fill valve.
If you aren’t going to replace your overflow tube and/or flapper. You’re done. Replace water line (see Wrap Up below), turn on your house water and flush to your heart’s desire. No more running toilet. You may need to adjust the fill valve levels and such. See the instructions in the box.
Running Toilet: Replace Overflow Tube/Flapper
If you’re running toilet is leaking into the bowl and causing your fill valve to fill either constantly or every so ofter throughout the day, your flapper is probably bad.
Step 9 – Cop-Out on Overflow Tube: In my running toilet case, I didn’t replace my overflow tube. I had done that before and it was still in good shape. I’d say, chances are you don’t need to change yours either. If your running toilet is slowing leaking into the bowl, you probably just need to change your flapper. Here’s a good flapper.
So I just cut my overflow tube to the right length and replaced the flapper.
Step 10 – Replace Flapper: The rubber flapper clips on to the overflow tube. You really just pull up on the connection points and the flapper comes off. If you have to pull hard, you’re not getting the angle right.
I hate to say this, but just play with it a bit and it will make sense. Like whistling, you’ll eventually just “get it” and it will be clear and easy.
The Fluidmaster flapper is great because you can adjust it by turning it. So if you want more/less water per flush, play with the dial settings. Fun for the whole family!
Step 11 – Attach Flush Chain: Attach the chain to the handle – make sure the length is good and that the extra links aren’t able to get sucked into the flapper hole. This will cause a leak into the bowl and the fill valve will run like every 3 seconds.
Step 12 – Maybe Change Overflow Tube: If you do need/want to replace the overflow tube, you’ll need to remove the tank. There’s two screws at the bottom of the tank. Remove those and lift the tank off. It’s really not that scary.
From the bottom of the tank, you can remove the nut holing the overflow tube on and replace it w/ the new one. Don’t over tighten, but get it pretty snug – you won’t be able to turn the overflow tube in the tank to get it tighter – there’s not enough room for full rotation.
When you put the tank back on, you’ll use the new, giant rubber washer that came with the repair kit. This part gives me the willies a bit. You’ll need to tighten the screws to get the tank back on. It may rub on the ceramic of the tank a bit.
It scares me b/c you can kind of keep tightening it for a while – that giant, rubber wash will compress a good bit. The tank may lean and it’s hard to know when to stop. I was always scared I would crack the tank and… great. I can’t finish the project, the water to the house is turned off, we can’t use this toilet, etc.
But if you don’t tighten it enough, oh boy. Actually, the first time I did it, I didn’t tighten it enough. The tank actually leaned backwards. I noticed it, tightened it and it was fine.
So you see why I said my overflow tube was fine. I’m skeerd. But actually, it was fine. Seriously, it’s fine. I’m still a man!
Running Toilet: Wrap Up
Step 13 – Replace Water Line: So if you haven’t yet, put the water line back on the shutoff valve and up to the fill valve on the bottom of the tank.
Step 14 – Turn on House Water: Turn the water back on to the house and hope. I had my wife stand in the bathroom and called her from outside when I turned the water back on. It leaked a bit the first time so I went back with teflon tap… that’s why you don’t see any teflon tape in the picture where I put the shutoff valve on. 🙂 Learn from my mistakes.
Step 15 – Pray: If all went well, the toilet should fill up (if you didn’t have the shutoff valve off, check that). If the fill valve is the right height, it should shut off before the top of the overflow tube.
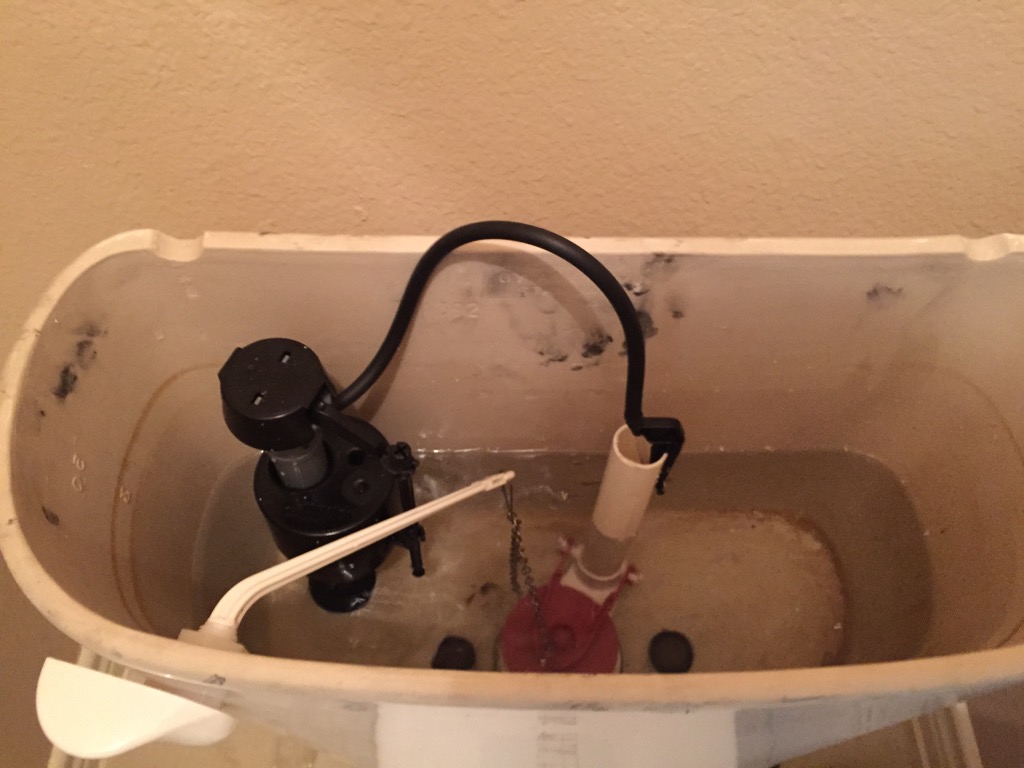
Step 16 – Celebrate: Flush, adjust as necessary and then celebrate. Have a fruity drink and take a celebratory poop or something. Take pics, blog about it and know that you’re an awesome manly man. No more running toilet.
I hope this helps! Let me know if you have any questions/comments.
If you did a project like this, do you have any tips or tricks to help?
Leave a Reply